Toilet Leaking from the Base? Fix It In 5 Steps
Last Updated on July 30, 2023 by toilethaven
Why is my toilet leaking from the base?
If your toilet leaks from the base, you must fix it before it destroys your floor or the basement ceiling. It can also result in a sewage smell in the house.
A toilet leaking from around the base is almost always caused by a bad wax ring that fails to seal between the bottom of the toilet and the drain line. It could also be caused by loose toilet bolts, a broken closet flange, a hairline crack on the bowl, a leaky toilet shut-off valve, or even a sweating toilet.
To fix a toilet leaking from the base, you will need to replace the wax ring or tighten the toilet bolts. A broken closet flange will also need to be replaced, the same as a leaking shut-off valve or supply line. Unfortunately, if you have a cracked bowl, you will need to replace it or the whole toilet.
The major sign of a bad toilet wax ring is when water leaks from the toilet’s base, especially during flushing. Other signs include a sewer smell in the bathroom and a leaking basement ceiling. A wobbling toilet is another sign though it could also be caused by loose bolts or a broken flange.
It costs between $200 and $250 to fix a toilet leaking from the base. Most of that is usually labor charges since replacement parts like wax rings, toilet bolts, and closet flanges are inexpensive.
How to Fix a Toilet That Leaks at the Base
To fix a toilet leaking at the base, you will first need to remove the toilet and then replace the wax ring and the toilet bolts if you have determined that the bowl is not cracked.
Materials Needed
- Wax ring/Rubber gasket
- Toilet bolts
- Old rag/rag
- Newspapers
- Putty knife
- Rubber gloves
- Adjustable wrench
- Mini hacksaw (optional)
- Sponge
- Empty bucket
Step 1: Drain the Toilet Tank
- Turn off the water supply to the toilet by turning the shut-off valve clockwise. The shut-off valve is located on the rear wall of the toilet.
- Flush the toilet and hold the lever down to remove as much water from the tank as possible.
- Remove the toilet tank lid and put it away where it cannot be knocked off and cracked.
- Mop up the water at the bottom of the toilet tank with the sponge squeezing it into the empty bucket.
- Use the same sponge to remove the water at the bottom of the toilet bowl. Remember to have your gloves on.
- Disconnect the water supply line from the toilet tank. Loosen the supply line coupling with your bare hand and only use the wrench if it is too tight.
Step 2: Remove the Toilet
- Use the adjustable spanner to loosen the 2 toilet bolts on each side of the toilet.
- If the toilet bolts are spinning or are too tight, cut the nuts off with a mini hacksaw. Be careful not to cut the toilet, though.
- Hold the toilet with both hands and rock it, about to break the wax seal completely.
- Lift off the toilet and gently place it on the newspapers on its side.
- Plug off the drainpipe with the old rag/towel. This will prevent foul gases from coming up into your bathroom.
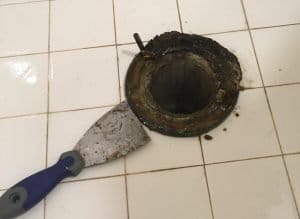
- Scrap off the old wax from the toilet flange and outlet with a putty knife and trash it away. Wax rings cannot be reused.
Step 3: Replace the Toilet Bolts and Wax Ring
- Remove the old toilet bolts and slot new ones in the toilet flange slots.
- Gently slide the wax ring on the toilet outlet to avoid deforming it. Some people prefer to set the wax ring on the flange and then install the toilet. The problem with that method is that the wax ring can shift during installation.
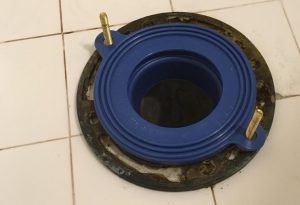
- If you are using a rubber gasket seal, just set it on top of the flange and proceed to install the toilet. Some rubber seals have holes that allow them to be held in place by the toilet bolts and therefore avoid shifting around.
Step 4: Install the Toilet
- Remove the rag from the drainpipe.
- Lift off the toilet and align the holes at the bottom with the toilet bolts and set it down gently. Owing to the weight of toilets, which at times can exceed 100 pounds, it would be very helpful to have someone help you with the alignment.
- Push the toilet gently and rock it to engage the wax ring fully.
- Put a washer and a nut on each bolt, and hand tighten.
- Use the adjustable wrench to tighten the bolts alternatingly to keep the toilet level. Care should be taken when tightening to avoid cracking the toilet bowl.
- If the bolts are protruding too much up, use the hacksaw to trim them.
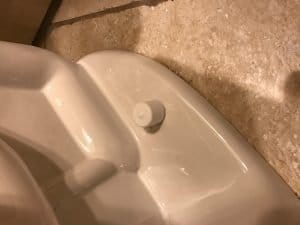
- Cover the bolts with color-matched caps.
Step 5: Reconnect the Water.
- Connect the water supply line back to the toilet tank and hand tighten. It would be best if you never used a wrench here.
- Open the shut-off valve.
- Flush the toilet a few times and keenly look at the base of the toilet for any leaking water.
- If the floor remains dry, put the toilet tank lid back on and clean your working area.
- If unsuccessful, you should try it again or call a professional plumber.
And that is how to fix a toilet that leaks at the base. If you will be working alone and you have a two-piece toilet, you would be well advised to consider removing the toilet tank first and then the bowl later.
The toilet tank is joined to the bowl using bolts, and there is always a chance it could crack during this repair. In case you would want to learn how to remove a toilet tank, read this post.
While installing the toilet tank later, you can also take the time to replace the toilet tank bolts and gasket (Spud washer), which are normally responsible when the toilet is leaking between the tank and the bowl. To learn how to do that, you read this post.
More Details About Why Your Toilet is Leaking From the Base
1. Loose or Corroded Toilet Bolts
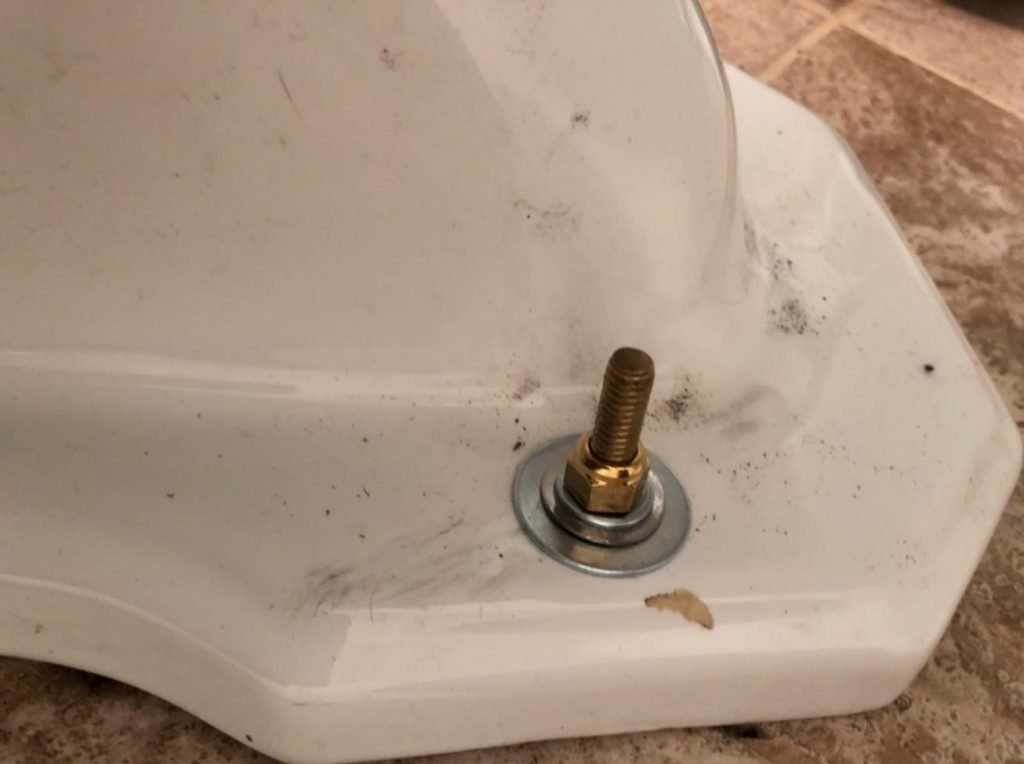
Toilet bolts are located on each side of the bowl. They are hooked on the toilet flange and slotted through holes in the toilet base. These bolts help anchor the toilet to the floor firmly and ensure the base of the toilet presses hard on the wax ring, making a watertight seal.
A wobbly toilet is one sign that the toilet bolts are loose. If the toilet has been wobbling for a while, there is a chance that it has unset the wax ring leading to a toilet that leaks at the base.
Toilet bolts are mostly covered with plastic caps that match the toilet’s color. To access the bolts, pry off the caps with a flathead screwdriver.
Use an adjustable wrench to tighten the toilet bolts. Do not, however, tighten the bolts too much that you crack the toilet bowl. As soon as the nut feels hard, give it a ¼ turn, and that’s it. Try to rock the toilet again. If it feels tight, then it is okay. In case it still wobbles, give each nut one more ¼ turn.
Sometimes you will notice that the bolts, instead of tightening, are spinning about. What you do here is to hold the top of the bolt with a vice grip of pliers, then tighten the nut with the wrench.
The toilet’s bolts are sometimes too old and rusted and will not tighten. If this is the case with you, you will have no alternative but to remove and replace them. To replace toilet bolts, you will need to remove the toilet, so get ready to work.
2. Wax Ring is not Sealing
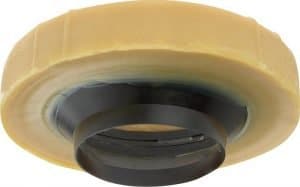
A wax ring is a ring of molded wax placed between the bottom of the toilet and the top of the toilet flange to provide a watertight and airtight seal. Whenever you notice your toilet leaking at the base, most of the time, the wax ring integrity is normally compromised.
Apart from water leaking at the toilet’s base, when a wax ring is not sealing correctly, you are most likely to have a sewer gas or urine smell in your bathroom.
In some instances, the water does not pool around the toilet base; rather, it flows through the floor and starts leaking from the basement ceiling. This can lead to rotting of the floor, subfloor, and basement ceiling, which can end up being very expensive repairs.
Replacing the wax ring is a simple task, and we always recommend that you replace the toilet bolts during this repair. Depending on your experience, this repair should take you 1 to 3 hours.
You could also use a rubber gasket seal instead of a wax ring. They both serve the same purpose, but a rubber gasket seal is not messy like a wax ring.
3. Hairline Crack on a Toilet Bowl.
A hairline crack can occur in old and new toilets, especially during installation. If you are not careful, your toilet could be sold to you with a hairline crack already in the toilet bowl. Sometimes they crack during transportation.
If you have a brand new toilet leaking at the base, unless the wax ring was badly installed, there is a good chance that your toilet bowl has a hairline crack.
Unfortunately, you cannot fix a hairline crack on a toilet. A toilet bowl with a hairline crack will need to be replaced. If you have a one-piece toilet, you will have to replace the entire toilet, but with a two-piece toilet, you will only need to replace the bowl.
4. Broken Closet Flange
A toilet flange, also known as a closet flange, is a piece of fitting that connects the bottom of the toilet to the drainpipe. It has slots allowing you to hook toilet bowl bolts and tighten them.
If the closet flange is broken, the toilet will start to wobble. As the toilet wobbles, it will unseat the wax ring, which will result in a toilet that leaks around the base.
While replacing the closet flange, you will have to replace the wax ring as well. This is, however, something you can do on your own, but you can hire a plumber as well.
I have written a guide on how to replace a toilet flange. Read it here.
5. Leaking Toilet Shut Off Valve or Supply Line
There is usually a shut-off valve on the wall behind the toilet with a supply line that is connected to the underside of the tank.
You may think that your toilet is leaking from around the base, but the problem could actually be a leaky shut-off valve or water supply line.
Check if the valve is dripping water on the floor or if the supply line is leaking where it is connected to the tank. Sometimes tightening the supply line coupling or the shut-off valve packing nut is enough to stop the leak.
It is not exactly easy to replace a shut-off valve, but most season DIYers will easily do it. Check out this post on how to replace a shut-off valve.
6. Cracked Bowl
Toilet bowls are made of porcelain and are, therefore, very easy to crack. The crack does not have to be a very big one. A hairline crack on the bowl will slowly leak from the inside of the bowl to around the base of the toilet without you noticing.
If the water level in the toilet bowl is dropping steadily and you have water pooling around the base of the bowl, then you most certainly have a cracked bowl.
Unfortunately, a cracked bowl cannot be repaired. You will need to replace it. If you have a 2-piece toilet, you can opt only to replace the bowl.
For people with a 1-piece toilet, the only way out will be to replace the entire toilet. Needless to say, that will be a very expensive repair.
7. Sweating Toilet
A sweating toilet, also known as toilet tank condensation, occurs when water droplets form outside the toilet tank and drip on the floor of the bathroom.
It is caused by a big difference in temperature between the cold water inside the tank and the warm surrounding air in the bathroom. It is especially common in hot areas.
I have written a detailed article on how you can deal with a sweating toilet. Read it here.