How to Replace a Toilet Flapper in 5 Minutes
Last Updated on August 1, 2023 by toilethaven
What is a Toilet Flapper?
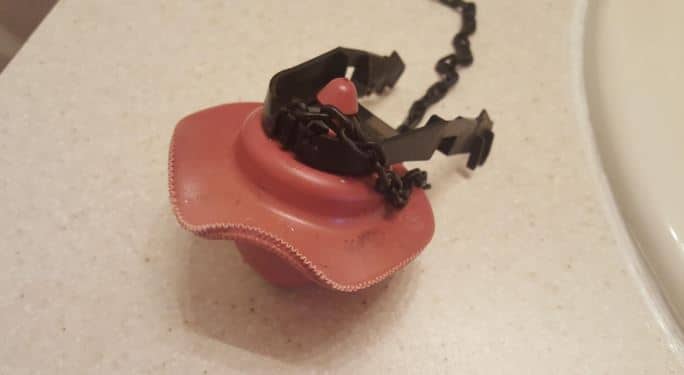
A toilet flapper is a rubber/plastic seal that sits on top of the flush valve opening in a toilet tank to prevent water from continuously running.
When you flush the toilet, the flapper lifts off, allowing water to enter the bowl, and after the flushing cycle, it seals the flush valve opening, and the tank starts to refill. Most modern toilets use a rubber toilet flapper, while some old ones use a hard plastic toilet flapper.
If you have a toilet that can’t stop running, most likely the toilet flapper is not sealing properly, and you will therefore have to replace it or sometimes just clean it.
To replace a toilet flapper, turn off the water supply to the toilet, then flush the tank. Remove the lid, disconnect the flapper chain from the flush handle arm, and detach the flapper from the flush valve. Attach the new flapper on the flush valve, then adjust and connect the flapper chain to the handle arm.
Turn the water on, and just to be sure the flapper is sealing, carry out the toilet leak test.
Remember that toilet flappers are not universal. Depending on the size of your flush valve, you will have a toilet flapper size of between 2 to 4 inches. Toilet flappers of the same size are, however, universal.
Replacing a toilet flapper involves the following steps:
- Turn off the water to the toilet
- Flush the toilet
- Remove tank lid
- Unhook the flapper chain from the handle arm
- Disconnect the flapper ears from the flush valve
- Position the new flapper and hook it to the flush valve and handle arm
How Does a Toilet Flapper Work?
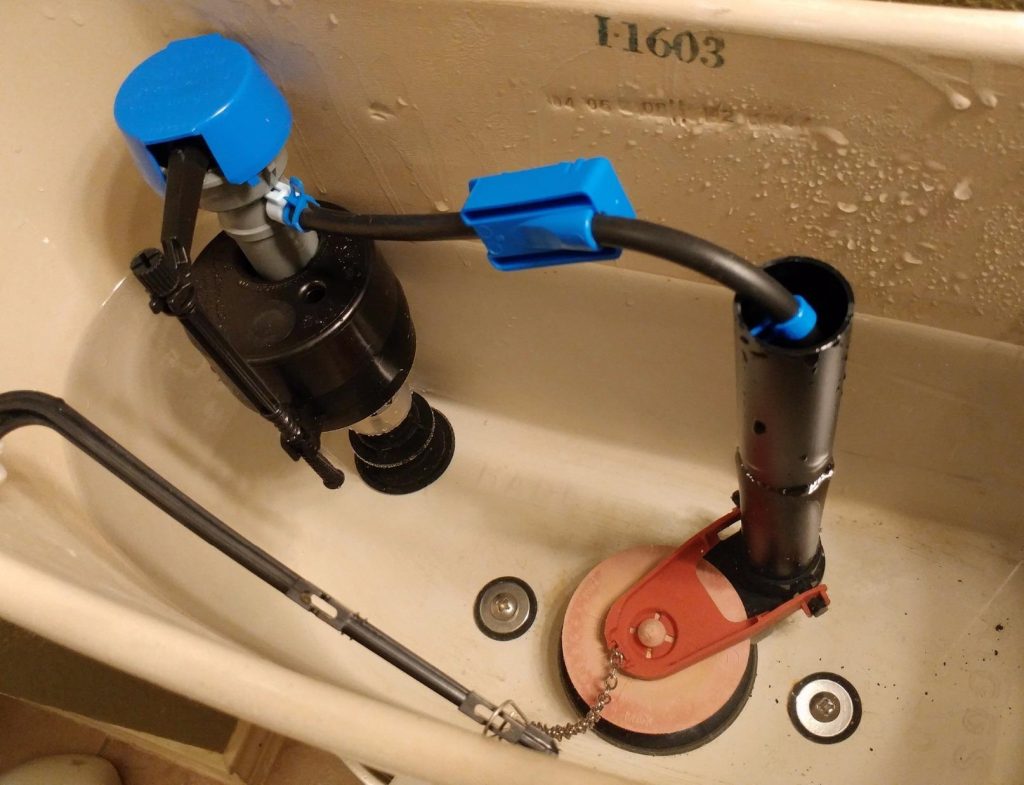
A toilet flapper sits on top of the flush valve opening and is connected to the toilet handle via a lift chain. The lift chain is hooked on the flushing handle arm, which on the other hand, is connected to the flushing handle on the outside of the toilet tank.
When you push the flushing handle down to flush the toilet, the lift chain, which until that time was slack, picks up tension and lifts off the flapper from the flush valve opening. Water leaves the toilet tank via the flush valve to go flush the toilet bowl.
When you release the flushing handle, the lift chain becomes slack, and the flapper falls back to the flush valve opening. The toilet tank then starts filling with water for the next flush cycle.
If the flapper is not working as it is designed to, water will continuously run into your toilet bowl, while the fill valve, which is responsible for filling the tank with water, continuously lets in water into the tank.
Should You Replace Your Toilet Flapper?
When you have a running toilet, there are a few toilet tank parts that could also be the problem and not just the flapper. These include:
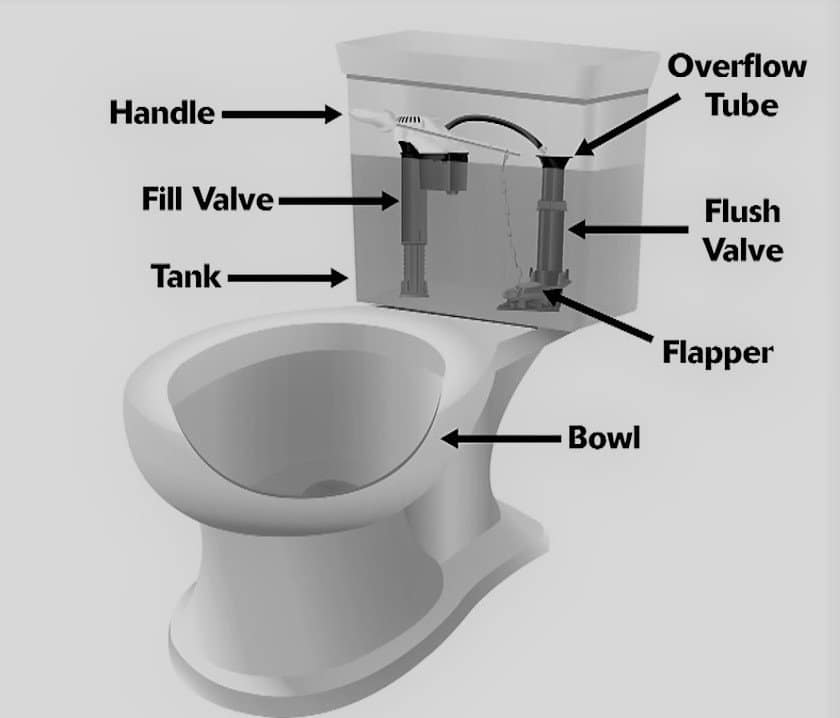
- Fill Valve – The fill valve is connected to the water supply line from underneath the toilet tank and is responsible for filling the tank with water after every flush. If defective, it continuously lets water into the tank, flowing down to the toilet bowl via the overflow tube.
- Overflow Tube – This is a large tube in the middle of the toilet tank. It sends excess water in the tank down to the bowl to prevent overflowing the toilet. The water level in the tank should be about ½ inch below the top of the overflow tube. If the overflow tube is cracked, the water you will continuously be run to the toilet bowl as the fill valve fills the tank with more water, and the overflow tube sends it down to the bowl.
- Lift Chain – The lift chain should always have a ½ inch slack when the toilet is unused. If it is too tight or is hooking against another toilet tank part, it will unset the toilet flapper from the flush valve resulting in a running toilet. Also, if the end of the lift chain is too long, it may sit on the flush valve opening, and the toilet flapper will not seal properly.
Apart from the above parts also contributing to a running toilet, another problem that often affects the toilet flapper is mineral deposits. After years of usage, mineral deposits in the water collect on the underside of the flapper and the top of the flush valve opening.
The mineral deposits prevent the flapper from sitting and sealing properly, resulting in a toilet that won’t stop running. Removing the flapper and cleaning it in a sink, and also cleaning the flush valve opening will fix that problem.
When Should You Replace the Toilet Flapper?
If your toilet flapper is 4/5 years old, you should replace it. Another sign to look out for is a hardened, warped, or worn-out flapper. A good toilet flapper should be soft and have a perfect round rubber to seal properly.

- LONG-LASTING DURABILITY: Toilet flapper with solid frame replaces leaky, corroded flappers, preventing twisting, ghost flushing, and running toilet problems
- UNIVERSAL DESIGN: Adjustable flapper fits most 2-inch flush valve toilets and is ideal for use in high efficiency 1.28 to 3.5 gallons per flush toilets
- ADJUSTABLE TO SAVE WATER: Dial flapper adjusts for maximum flush efficiency and to save water
If you have a running toilet, remove the toilet tank lid and press the toilet flapper down with a screwdriver or long pin. If it stops running, the flapper is the problem, and you should replace it.
What Size of Toilet Flapper Do You Need?
Before going ahead to replace your toilet flapper, you must first buy the right size of the flapper. All flappers are not the same size.
Toilet flappers come mainly in 2 sizes: the 2-inch toilet flappers and the 3-inch toilet flappers. Most toilets use a 2-inch flapper, but newer ones use a bigger 3-inch flapper.
Having said that, it is also important to note that even fewer toilet models, like American Standard Champion 4, have a 4-inch flush valve. Therefore, getting your flush valve size right before buying a toilet flapper is important.
The size of the flush valve determines the size of the toilet flapper. Bigger flush valves mean that water leaves the toilet tank and enters the bowl with more force and therefore results in a more powerful flush.
How to Replace a Toilet Flapper
Replacing a toilet flapper is a straightforward task and should take you no more than 10 minutes if you already have the new toilet flapper with you. New toilet flappers are usually sold with a new lift chain, so you will need to remove and discard your old one.
Here is how to replace a toilet flapper like a plumber:
Step 1: Turn off the Water to the Toilet.
- The toilet shut-off valve is located on the wall behind the toilet. Turn it clockwise.
- If you have a push/pull valve, then pull the valve handle out.
- Flush the toilet and hold the flush handle down to remove as much water as possible.
Step 2: Remove the old Toilet Flapper
- Remove the toilet tank lid and place it in a safe place. Remember, it is made of porcelain and could crack easily.
- Unhook the lift chain from the flush handle arm. The arm is connected to the flush handle trip on the inside of the toilet tank, and its end is perpendicular to the toilet flapper, which provides a means for hooking up the lift chain. Let the lift chain fall into the tank.
- The toilet flapper has 2 ears connected to pegs on the overflow tube. Unhook the ears from the overflow tube pegs and lift off the flapper and the lift chain.
Step 3: Install the New Toilet Flapper

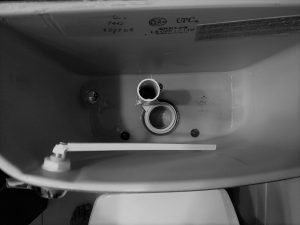
- To make sure that the new flapper seals properly, use a soft material to clean the top of the flush valve opening where the toilet flapper will sit. Sometimes there are some mineral deposits on top of it.
- Set the new flapper on top of the flush valve opening and hook up its ears to the pegs on the overflow tube.
- Connect the lift chain to the flush handle arm and adjust its length. The lift chain should have about a ½ inch slack. It takes you a few tries to get the right length right.
- Push down on the flush handle to ensure the flapper’s range of motion is right and that the lift chain is not hooking up to anything.
Step 4: Test the New Flapper

- Turn on the water supply to the toilet and let the toilet tank fill with water.
- Watch and listen carefully for any water leaking into the bowl.
- Flush the toilet a few times and check if the flapper is sealing effectively.
- If you are happy with everything, put the toilet tank lid back on and trash your old flapper and lift chain.
And that is how to replace a toilet flapper by yourself. If this doesn’t fix the problem of a running toilet, then you might have to replace other toilet tank parts and especially the flush valve.
Conclusion
A toilet flapper costs around 5 dollars, while a plumber will charge you between 50 and 150 dollars to replace it. This means that by learning how to replace a toilet flapper on your own, you will save upwards of 50 dollars. We have also seen that it is not always that when you have a running toilet, you need to replace a flapper. Sometimes a simple task like just cleaning it will sort out the issue.
FAQs
1. Can you replace the toilet flapper in a toilet?
Yes. If all other toilet tank parts are in good working condition, then you can replace the toilet flapper only. Most people, however, opt to replace the toilet flapper and fill the valve at the same time.
2. Which is the best toilet flapper to buy?
Apart from buying a toilet flapper from your toilet’s manufacturer, Fluidmaster and Korky toilet, flappers are also among the best.
3. Are toilet flappers universal?
The only thing that is different in toilet flappers is their size. They range from 2 to 4 inches. This means all 2-inch flappers can be installed in any toilet with a 2-inch flush valve. The same is also true for 3 and 4-inch flush valves.
4. What are the different types of toilet flappers?
There are 3 types of toilet flappers: seat disk, tank ball, and rubber toilet flappers. Rubber toilet flappers are the most common and are found in modern toilets.