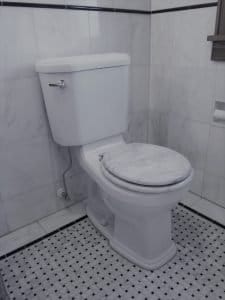
How to Fix a Leaking Toilet Tank: 5 Easy Steps
Last Updated on August 1, 2023 by toilethaven
Why is My Toilet Leaking from the Tank?
A toilet tank is installed on top of the toilet bowl using 2 or sometimes 3 bolts. Water leaves the toilet tank and enters the bowl through the flush valve.
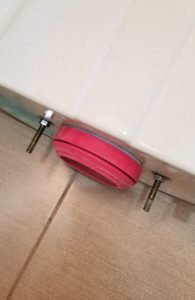
To prevent water from leaking between the tank and the bowl, a toilet tank-to-bowl gasket, also known as a spud washer, is installed outside and around the flush valve. The tight toilet tank bolts hold it in place to provide a watertight seal.
If you have a leaking toilet tank, it is a sign of a worn-out toilet tank to bowl gasket, loose/corroded tank bolts, worn-out tank bolt washers, or a loose/damaged water supply line. A toilet leaking from the bottom of the tank, when flushed, means the tank to bowl gasket is worn out.
When the toilet tank leaks continuously onto the floor, it is most likely leaking from the tank bolts that are either loose, corroded or their rubber washers are worn out. Toilet tank bolts have metal and rubber washers.
If your toilet tank continuously leaks from the tank to the bowl, you have a running toilet. This likely means the toilet flapper is not sealing properly (worn out/warped/dirty), or the toilet fill valve is defective.
Water flowing or leaking from the top of your tank means your toilet is overflowing. If you have a constantly running toilet, learn how to fix it here. If your toilet tank is overflowing, this is how to fix it.
How Do You Fix a Leaking Toilet Tank?
To fix a leaking toilet tank, you will need to replace the toilet tank with a bowl gasket. Sometimes tightening the tank bolts is enough to fix the problem. If that fails, you will have to replace the tank bolts as well.
If the toilet tank leaks from the water supply line connection, grab an adjustable wrench and gently tighten it. If this does not fix the problem, there is a big chance that the connection threads will be stripped, and you will need to replace it.
The toilet tank bolts rubber washers serve 2 functions. First, they prevent the toilet from leaking at the toilet tank bolts, and second, they prevent the tank from cracking if you overtighten the bolts during installation.
The correct way to install the toilet tank bolts is to ensure that the rubber washers are the ones in contact with the body of the tank while the steel washers are between the rubber washers and the nuts.
Materials Needed
- New gasket, bolts, and washers
- Long screwdriver
- Adjustable wrench
- Sponge
- Rubber gloves
How to Replace a Toilet Tank to Bowl Gasket
Toilet tank to bowl gaskets are universal but come in different sizes ranging from 2-4 inches in accordance with the size of the flush valve.
To know the size of your toilet tank flush valve, remove the lid and check at the opening below the toilet flapper. If it is roughly the size of a tennis ball, you have a 2-inch flush valve, but if it looks more like the size of a softball, then you have a 3-inch flush valve. An even better way is to search for your toilet’s specification sheet from the manufacturer’s website using the toilet model number.
Before replacing the toilet tank with a bowl gasket, it is also important to check whether you have a 2 or 3-bolt toilet tank. To do this, look at the bottom of the tank for 2 or 3 bolt heads.
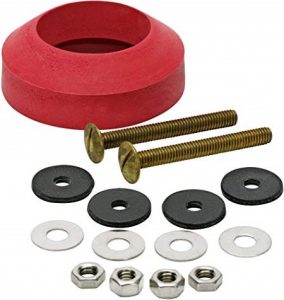
The Fluidmaster universal toilet tank to bowl gasket is one of the best in the market.

- Universal gasket
- Sponge rubber gasket fits most close-coupled toilets with both round and hex shaped flush valve nuts
- Durable solid brass bolts
Step 1: Drain the Toilet Tank
- Locate the toilet shut-off valve on the wall behind the toilet and turn it clockwise.
- Flush the toilet and hold down the lever to remove as much water as possible.
- Take off the toilet tank lid and place it away safely.
- There will still be water left at the bottom of the toilet tank. Use the sponge to soak it until the tank is dry.
- Disconnect the water supply line from the toilet tank. The water supply line is the braided line connected from the shut-off valve to the bottom of the tank. The coupling should be hand-tight, so do not use a wrench before loosening it with your bare hand.
Step 2: Remove the Toilet tank
- The toilet tank is connected to the bowl underneath it using nuts and washers. Use an adjustable wrench to loosen the nuts.
- Sometimes instead of the nuts loosening, you will find that the whole bolt is spinning. If this is the case, put a screwdriver inside the toilet tank and engage the head of the bolt. Hold the bolt head in place as you loosen the nut with the wrench.
- Toilet tank bolts are sometimes corroded and so tight that they will not come off. In this case, spray a penetrating oil like WD-40 and wait 15 minutes. If, even after that, the bolts will still not come off, use a drilling machine with a ¼ inch bit to enlarge the nut. When it is weak enough, use the wrench to break it off.
- After the toilet is free, lift it off and place it on its side on a safe flat surface when it cannot crack.
Step 3: Replace the Tank with Bowl Gasket and Toilet Tank Bolts
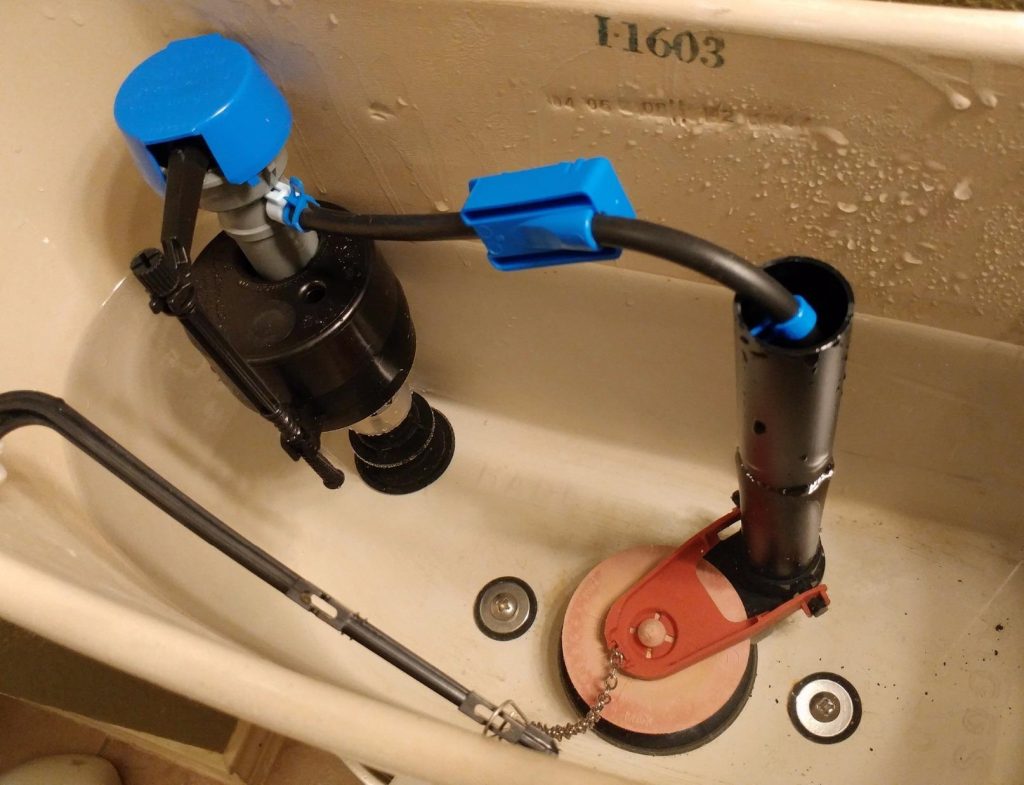
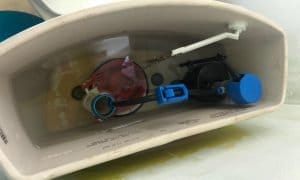
- With the toilet tank out, you can now see the toilet tank gasket at the bottom. Slide it out and check its general condition.
- Wiggle the toilet tank bolts and remove them from the inside of the tank.
- Clean the area where the new gasket will sit and inside the tank where the bolts and washers will sit too. Sometimes there is debris or mineral deposits that accumulate over time.
- Slide in the new gasket and make sure it covers the entire flush valve lock nut.
- Put a steel washer followed by a rubber one on each toilet tank bolt.
- Slot the bolts in the holes at the bottom of the tank from the inside of the tank.
- Put in a steel washer and a nut on each protruding bolt and tighten them but not too much that you crack the tank.
Step 4: Install the Toilet Tank
- Lift off the toilet tank and guide the bolts through the mounting holes on the toilet bowl.
- From the protruding ends of each bolt on the underside of the bowl, put a rubber washer and a nut. Some kits come with an extra steel washer to use with the rubber washer.
- Tighten the toilet tank in place. The best way to do it is to tighten the 2 bolts alternatingly to keep the toilet tank level.
- While tightening, don’t overdo the nuts; otherwise, you might crack the tank. While at it, don’t also fear tightening such that you are left with a wobbly toilet tank.
Step 5: Connect the Water Back
- Reconnect the water supply line back to the toilet tank. To avoid deforming the coupling, tighten it with your bare hand and not a wrench.
- Check the inside of the tank to make everything is in order. Ensure the flapper is sitting pretty on the flush valve and that the lift chain is free.
- Turn on the water shut-off valve by turning it counterclockwise.
- Use a rag to dry the area between the tank and the bowl.
- Flush the toilet a couple of times and watch if the area between the tank and the bowl remains dry.
- If it’s all good, put the toilet tank back on and continue using the toilet.