How to Replace a Toilet Flush Valve – Stop the Running Toilet
Last Updated on August 1, 2023 by toilethaven
How do you tell your toilet flush valve is bad?
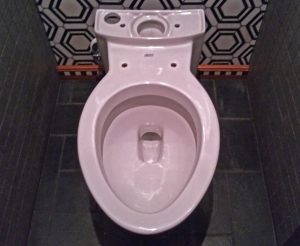
A toilet flush valve opens at the bottom of the toilet tank, where water leaves the tank and enters the bowl during flushing. A toilet flapper sits on top of the flush valve to prevent the water from continuously running into the bowl when the toilet is not being flushed.
To replace a toilet flush valve, turn off the water to the toilet, drain the tank, disconnect the water supply line then remove the tank. Remove the old flush valve, install the new one, and put the tank back on the bowl. Connect the water supply and flush the toilet. Check for leaks between the tank and the bowl.
To remove a toilet flush valve, remove the toilet tank and place it on its side. Slide out the tank to the bowl gasket, then loosen the flush valve mounting nut using slip-joint pliers. Disconnect the flapper from the flush valve and lift it out of the tank.
Toilet flush valves are not universal. They vary in size between 2 and 4 inches. Apart from that, there are different flush valves, like the standard flush valve, canister-style flush valves, dual flush valves, and flushometers.
However, for toilets with the same size and type of flush valve, their flush valves are universal.
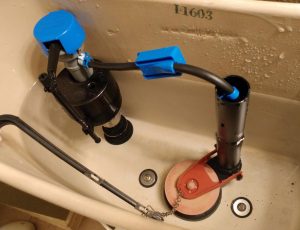
When you have a running toilet, most of the time, the flapper or the fill valve is the problem, but sometimes the flush valve is the culprit.
Replacing a toilet flush valve is not hard, but it is time-consuming. You will first need to remove the toilet tank and then install it back after replacing the flush valve.
If your toilet is continuously running even after replacing the flapper and fill valve, it is a sign that you have a bad/crack flush valve. Water will slowly trickle inside the bowl and, after some time, followed by ghost flushing.
A toilet tank-to-bowl gasket is installed outside the flush valve where the toilet tank sits on the bowl. This prevents water from leaking between the tank and the bowl.
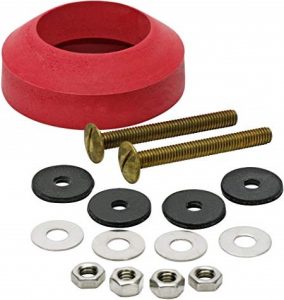
Most people prefer to change this gasket also as they replace the flush valve. It is inexpensive and comes with new toilet tank bolts, which you should replace.
Alternatively, you could buy a complete toilet tank repair kit that contains a flush valve, toilet tank to bowl gasket, toilet tank bolts, flapper, fill valve, and toilet float. This should serve you for 5 years or more.
Toilet Flush Valve Types
There are 4 main types of flush valves. These are:
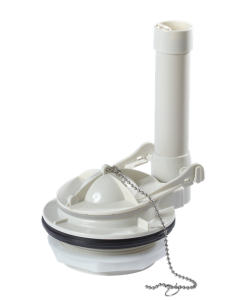
- Standard flush valves
- Canister flush valves
- Flushometers
- Dual-flush valves
In these posts, we will focus on the standard flush valves. You most likely have a canister-type flush valve if you have a Kohler toilet. Check out how to fix it in this post.
On the other hand, if you have a dual flush toilet, your toilet tank looks different from a single flush toilet tank. See how to fix it in this post.
Most flush valves are universal, but they must be the same size. Flush valves vary in size from 2 to 4 inches. Most toilets have a 2-inch flush valve, but modern low-flow toilets have larger flush valves and an even larger trapway to give the toilet a powerful flush while using less water.
An example of this is the American Standard Champion 4. It has a 4-inch flush with a consumption of 1.6 gallons per flush. It is among the best flushing toilet.
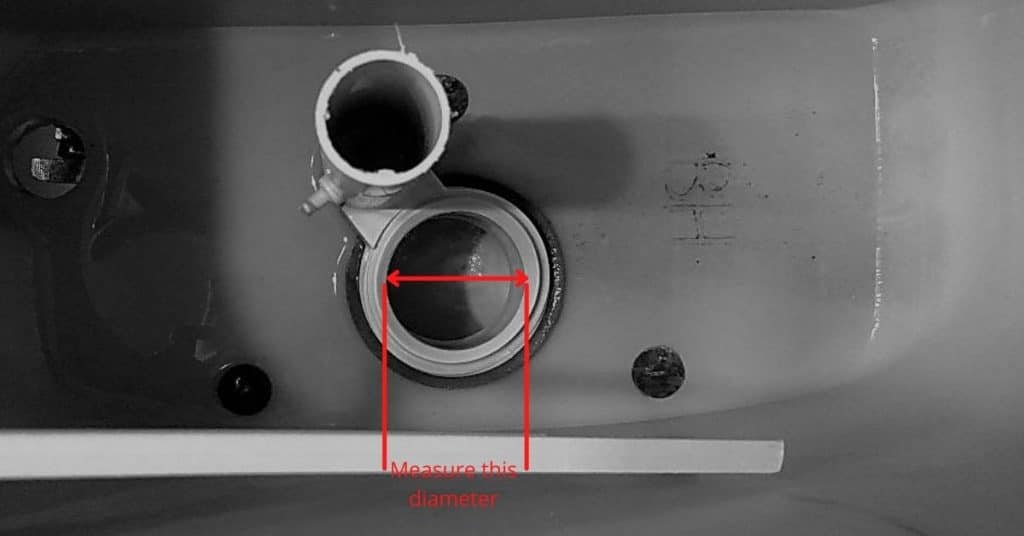
How do you know the size of your flush valve? Some people use a tennis ball to compare it with a 2-inch flush valve and a softball to a 3-inch flush valve.
The best way to tell your toilet’s flush valve size is to search for its name and model number on the manufacturer’s website. You will find a specification sheet with all of your toilet dimensions. The toilet model number is usually stamped on the inside of the toilet tank.
Once you have purchased the correct flush valve size, you are ready to replace it. Gather together all the materials needed.
Materials Needed
- New Flush valve
- Long screwdriver
- Adjustable wrench
- Channel-lock pliers
- Sponge
- Rag or towel
- Hacksaw blade (optional)
- WD-40 (optional)
How to Replace a Toilet Flush Valve
Replacing a toilet flush valve involves the following steps:
- Empty the toilet tank
- Remove the toilet tank
- Remove the old flush valve
- Install the new flush valve
- Install the toilet tank
- Test the new flush valve
Step 1: Drain the Toilet Tank
- Turn off the water supply to the toilet tank. The shut-off valve is the knob on the wall behind the toilet. Turn this knob clockwise.
- Flush the toilet but keep the flushing lever down to remove as much water from the tank as possible.
- Lift off the toilet tank lid and place it in a safe place. Remember, it is made of ceramic and could crack easily.
- Use the sponge to soak the water left at the toilet tank’s bottom. Squeeze the water out in the bowl until the tank is dry.
- Disconnect the water supply line from the tank. This line runs from the shut-off valve to underneath the tank. Loosen the coupling from the tank using your hand. Use a wrench if it is too tight, and be gentle.
Step 2: Remove the Toilet tank
- The toilet tank is attached to the bowl using 2 or 3 bolts. Look for the bolt nuts from underneath the bowl. Use a wrench to loosen them.
- Sometimes you will find that the bolts will spin about and not loosen. Put the screwdriver inside the toilet tank and engage the bolt’s head. Back the bolt heads off as you embark on loosening with the wrench.
- If, unfortunately, the bolts are corroded and too tight that they won’t just come off, spray some WD-40 and wait a little while before starting to loosen again.
- The WD-40 may not always work, and you will need to cut the nuts off. It would be best to use only the hacksaw blade and not the whole hacksaw because the space is very small; hence a hacksaw may not fit.
- When the toilet tank is free, lift it off and gently place it on its side on top of the towel or rag.
Step 2: Remove the Old Flush Valve
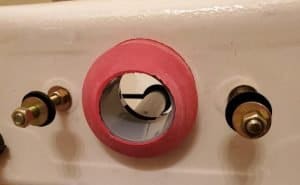
- The tank-to-bowl gasket covers the entire flush valve lock nut. To access the lock nut, slide out the gasket.
- The lock nut holds the flush valve tight on the tank. Use the channel lock pliers to loosen the lock nut. If you don’t have these pliers, you can use a screwdriver and a hammer to give the nut some gentle counterclockwise taps.
- Once the nut is out, the flush valve is now almost free. You will need to unhook the toilet flapper from the overflow tube. The toilet overflow tube is connected to the flush valve at the bottom of the tank.
- A thin tube called the refill tube is connected from the fill valve to the overflow tube. Unclip the refill tube.
- Pull out the old flush valve from the tank.
- Use the screwdriver and wrench to loosen the toilet tank bolts and remove them from the inside of the tank.
Step 3: Install the New Flush Valve

- Remove the lock nut from the new flush valve.
- Put the flush valve from the inside of the tank and tighten it with the lock nut from the bottom of the tank.
- Slide in the toilet tank to the bowl gasket such that it covers the entire flush valve lock nut.
- Slot the toilet tank bolts through the holes at the bottom of the tank. Toilet tank bolts use steel and rubber washers. The rubber washers should be in contact with the tank’s body. They prevent the tank from cracking if you overtighten the bolts and also prevent the tank from leaking.
- Put another pair of washers and a nut on the toilet tank bolts and tighten with the screwdriver and the wrench. Remember not to tighten the bolts too much lest you crack the toilet tank.
Step 4: Install the Toilet Tank
- Lift off the toilet tank and guide the bolts through the toilet bowl mounting holes.
- The toilet tank bolts will protrude from underneath the toilet tank. Put a rubber washer, a steel washer, and a nut on each bolt.
- To keep the toilet level, tighten the bolts alternatingly initially with your hands before using a wrench.
- Again, care must be taken not to tighten the bolts too much that the tank is cracked.
- Put the toilet flapper on top of the flush valve opening and hook its ears on the overflow tube’s pegs.
- Connect the refill tube back to the overflow tube.
- The top of the overflow tube should be about ½-1 inch below the flush lever. If it’s longer than that, cut it off with a hacksaw. This will prevent your toilet tank from overflowing.
- Reconnect the toilet water supply line back to the tank. Again, this should only be hand-tight.
Step 5: Test the New Flush Valve
- Open the shut-off valve and let the toilet tank fill with water.
- Check for any leaks between the tank and the bowl. This will tell you if the toilet tank to bowl gasket seals correctly.
- Flush the toilet a couple of times. If you had a running toilet, it should now stop. To be sure the toilet is not dripping even the least amount of water, wait a few minutes and hold toilet paper below the rim of the toilet. The toilet paper should stay dry.
- If you are pleased with everything, put your toilet tank lid back on and enjoy your throne.
And that is how to replace a toilet flush valve. If you want to replace the toilet flapper or the fill valve, check out these informative posts.