How to Clean a Toilet Siphon and Rim Jets
Last Updated on August 6, 2023 by toilethaven
Have you noticed that water takes too long to flow from the toilet tank to the bowl resulting in a slow-flushing toilet? It is very frustrating. You might even be tempted to replace your toilet. All you, however, need to do is clean your toilet siphon and the rim jets.
In order for a toilet to flush powerfully, a huge amount of water has to be dumped in the bowl within the shortest time possible. The sudden dumping of water is what initiates the siphoning effect at the toilet trap.
The toilet trap is the U-shaped bend at the bottom of the toilet bowl that drains to the drainpipe. When water from the tank enters the bowl slowly, the siphon is weak, resulting in a weak flush where you will need to flush your toilet twice or thrice.
To clean a toilet siphon jet, drain the water at the bottom of the bowl, then pour 2 cups of vinegar via the overflow tube. Add a cup of baking soda and wait for the solution to break down the minerals and debris clogging the jet. Scrub the bowl with a brush, then flush the toilet.
The Siphon Jet and Rim Holes
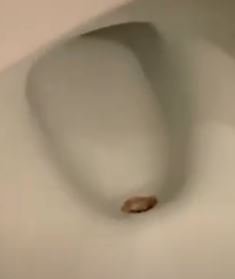
Water enters the bowl through 2 channels. Most of the water enters the bowl through a siphon jet at the bottom of the toilet bowl, which faces the toilet trap. The water is therefore sent directly into the trap creating a powerful flush.

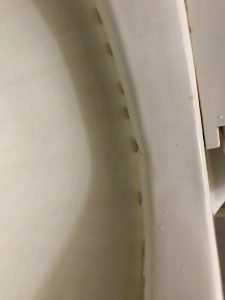
The rest of the water enters the bowl through jets on the rim of the toilet. The rims are positioned at an angle such that water entering the bowl will swirl, effectively cleaning and rinsing the bowl.
After continued usage, the siphon jet and rim holes become clogged by minerals found in the water, especially calcium. This inhibits the natural flow of water, causing a slow flushing toilet.

While cleaning a toilet bowl, most people concentrate more on the rim jets and forget the siphon jet, which contributes more to toilet flushing. I will show you how to clean both the siphon and the rim jets and create a powerful flushing toilet.
How to Clean a Toilet Siphon and Rim Jets
In order to work effectively and safely, you will need the following materials:
- Vinegar
- Baking soda
- Funnel
- Sponge
- Bucket
- L-shaped 3/16’’ Allen wrench
- Rubber gloves
- Toilet brush
Step 1: Drain the toilet
Since we will use vinegar to clean the siphon and rim jets, you will first need to drain the toilet tank and the bowl. This will give the vinegar room to work directly on the mineral deposits.
- Turn off the water supply to the toilet. You will locate the shut-off valve on the wall behind the toilet. Turn it clockwise, and if you have a push/pull valve, pull it all the way out.
- Flush the toilet and hold the flushing handle down to remove as much water as possible.
- Lift off the toilet tank lid and place it in a safe place where it can’t fall off and break.
- Use a sponge to soak up the water at the bottom of the tank and squeeze it out into the bucket. Mop the tank dry.
- Use the sponge to soak up the water at the bottom of the bowl. Unlike the water in the tank, this water is dirty, and you should have your gloves on. The water acts as a barrier to prevent sewer gases from coming up to your bathroom, so you should hurry up to the next steps.
Step 2: Cover the rim jets with duct tape
If you are unsure what the rim jets look like, hold a small mirror against the rim of the toilet bowl and move it around. You will see the small holes and how clogged/stained they are.
Cover all the holes with duct tape. The reason for covering them is to stop the vinegar from flowing into the bowl as fast as the water. Instead, it will be trapped inside the rim and therefore eat away the calcium.
Step 3: Pour the Vinegar
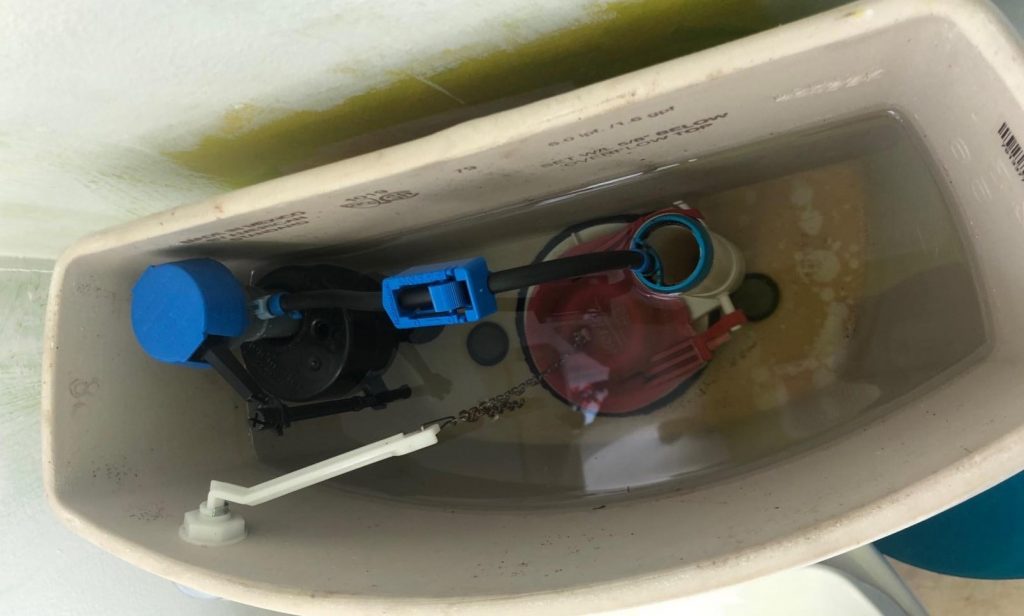
If your siphon jet and rim holes are clogged, it also means the inside of your toilet tank has many of these minerals. It makes no sense to clean the rim jets and leave the tank dirty. After a while, the minerals in the tank will clog the rims’ jets.
You should therefore take the time to clean your toilet tank as you clean the rim jets. Pour vinegar inside the toilet tank and make sure it covers all of the stains. Next, you will need to pour vinegar into the rim and siphon jet.

There is a large tube inside the tank with a small tube clipped on it called an overflow tube. Insert a funnel inside the overflow tube and start pouring vinegar. The overflow tube is connected to the flush valve. Make sure you pour enough vinegar that replaces the water that was at the bottom of the bowl.
Some vinegar will be trapped inside the toilet rim, while most will flow down to the bowl and sit there. The siphon jet will therefore be full of vinegar. This vinegar will eliminate the minerals in the toilet trap and the siphon jet. Let the vinegar sit for about an away. If your toilet is in bad shape, you can leave it overnight.
Some prefer using bleach, muriatic acid, or other chemicals instead of vinegar. The problem with these chemicals is that they interfere with some toilet tank parts, like the flapper and tank bolt washers made of rubber. These parts deteriorate, and the tank starts to leak.
Step 4: Clean the Rim Jets with an Allen wrench

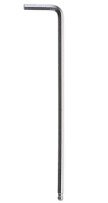
After one hour, remove the duct tape and let the vinegar flow out. Insert the Allen wrench on each rim hole and rotate it about to make sure they are fully open.
The L-shaped Allen wrench works well since you are able to hold it and turn it about. If you don’t have an Allen wrench or the right size, you can use a piece of wire.
Step 5: Flush the toilet
By flushing the toilet, you will be forcing the vinegar in the tank through the unclogged rim jets with the dissolved minerals. The vinegar at the bottom of the bowl will be pushed down the drain while the one in the tank will replace it.
Use a spray bottle to spray a disinfectant in the toilet tank focusing more on where the stains are saturated.
Step 6: Add the baking soda
Slowly add 1 cup of baking soda inside the toilet bowl. Since the baking soda is alkaline and the vinegar is a mild acid, a fizzing reaction will occur, and it is therefore important that you add the baking soda slowly.
Using a toilet brush to swish the solution around the bowl, focusing more on the rim after every 5 minutes for 30 minutes.
Step 7: clean the tank
Use a firm-bristled hand brush or a heavy-duty scrub sponge to scrub the stains in the toilet tank, especially on the walls and at the bottom. In tiny spaces where the hand brush cannot reach, use a toothbrush until the tank is sparkling clean.
Step 8: Clean the rim holes, bowl, and siphon jet
Using the toilet brush, scrub hard against the toilet rim to remove all the stains and any mineral deposits still left. Look for any other hard water stains in the bowl and scrub them away.
Insert your finger inside the siphon jet (wearing gloves) to see if calcium is still left. Now that the vinegar has loosened flushing the toilet should easily push it down the drain.
Step 9: The moment of truth
Turn on the water shut-off valve and let the tank fill with water. Flush the toilet and observe how fast the water flows to the bowl. Also, check if the toilet flushes as powerful as it should.
Suppose everything is working perfectly, then congratulations! Sometimes you might see an improvement but not the results you wanted. You might have to do this one more time to have it fully fixed.
Toilet Siphon Jet and Rim Holes Maintenance
You do not have to wait until the rim jets are clogged in order for you to clean them. There is a simple method you can use to make sure they are always opened. Occasionally, heat up some vinegar (not too hot) and pour it down the toilet overflow tube.
The hot vinegar is very effective in eating away the mineral deposits. You can also pour a small amount of dish soap down the overflow tube, which also dissolves the calcium and opens the rim holes. This makes sure your toilet flushes powerfully all the time.
Dumping a bucket of hot water in the toilet bowl helps to prevent mineral buildup in the toilet trap, and you should do it often. The water should, however, not be too hot because it could crack the bowl.