How to Install/Replace a Toilet Tank in 5 Easy Steps
Last Updated on July 18, 2023 by toilethaven
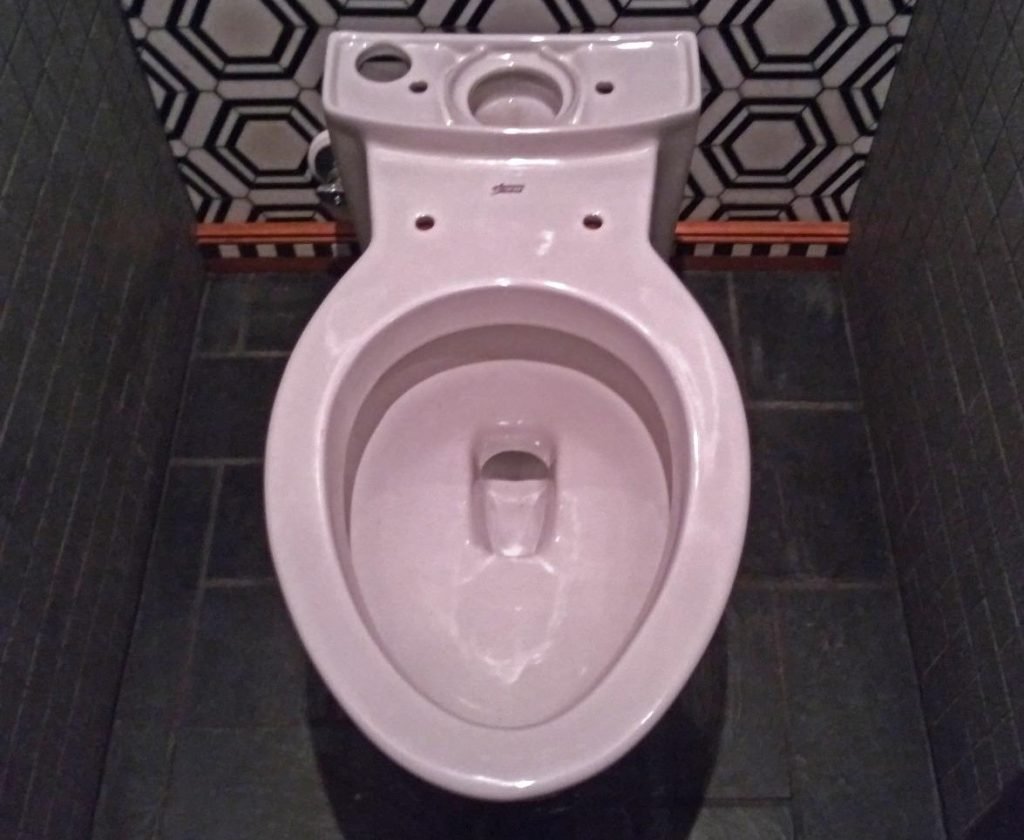
If you have a two-piece toilet, chances are that you might, at some point, want to replace the toilet tank and not the bowl. If that is your situation, I will show you how to remove and install a toilet tank.
Toilet tanks are mounted on top of the toilet bowl using 2 and sometimes 3 bolts. Each bolt is backed up by metallic and rubber washers to avoid leaks and wobbling.
A toilet tank-to-bowl gasket is also installed on the outside of the flush valve to prevent the toilet from leaking between the tank and the bowl. The tank is then attached to the water shut-off valve using a supply line.
Before installing a toilet tank, you may need to remove the old tank first. I will show you how to do that as well.
Installing a toilet tank involves the following steps:
- Drain the old toilet tank
- Remove the old toilet tank
- Install the new toilet tank
- Reconnect the water supply to the toilet
Materials Needed to Install a Toilet Tank
- A new toilet tank
- Toilet tank gasket
- All the toilet tank parts
- Toilet tank bolts, nuts, and washers
- Empty Bucket
- Sponge
- Flathead screwdriver
- Adjustable wrench
Step 1: Turn Off Water to the Toilet
To turn off the water to the toilet, locate the shut-off valve at the rear wall of the toilet close to the floor. It is mostly located on the left-hand side. Turn it off clockwise.
Some toilets, however, have a push/pull valve. In this case, pull the valve handle outwards.
Step 2: Drain the Toilet Tank
- Flush the toilet and hold down the handle to ensure as much water as possible has drained.
- Remove the toilet tank lid and place it away.
- At the bottom of the tank, you will find some water not flushed down. Use the sponge to soak it and squeeze it into the empty bucket.
- Disconnect the water supply line. The Water supply line is a stainless steel braided water line connected from the shut-off valve to the toilet tank. It is connected to the fill valve from underneath the toilet tank. It is always advisable to loosen its coupling using your bare hand first before attempting with a wrench.
Step 3: Remove the Old Toilet Tank
The toilet tank is attached to the toilet bowl using 2 or 3 long bolts that run through the inside of the tank and are tightened from underneath the toilet bowl using nuts and washers. To remove the toilet tank, proceed as follows:
- Using an adjustable wrench, loosen the nuts attaching the tank from underneath the bowl.
- If the nuts look corroded or are just too tigh40t, spray them with a penetrating oil like WD-40 and wait 15 minutes before attempting again.
- If, on the other hand, the whole bolt is swiveling, use a long screwdriver to hold it from inside the toilet tank while you loosen the nut below with the wrench.
- Some nuts are, however, too corroded, and even after using penetrating oil, they won’t loosen. In this case, use a hacksaw blade to cut the nut off. I say hacksaw blade since the whole hacksaw cannot fit in that tiny space.
- When the nuts are out, the toilet tank is loose, and you have to lift it off.
- If this is a toilet tank that you don’t need to replace, then junk it off appropriately together with the lid.
Step 4: Install the New Toilet Tank
When installing a new toilet tank, it is good to replace the toilet tank bolts, toilet tank to-bowl gasket, nuts, and washers.
- Make sure that the toilet tank is lying on its side on a flat surface. Please don’t do it on top of the toilet bowl since you can easily crack it.
- Take a toilet tank bolt and insert a steel washer, followed by a rubber washer. Do the same for the other bolt.
- Put the bolts in the toilet tank holes from the inside of the tank. The idea is to ensure the rubber washer is in contact with the toilet tank. This prevents it from cracking in case you over-tighten it.
- On the underside of the tank, slot in a rubber washer on each bolt, followed by a steel washer and a nut. Again, make sure the rubber washer is in contact with the toilet tank body.
- Hand-tighten the nuts on the bolts.
- Put the screwdriver in the tank and engage the head of each bolt while you tighten the nut on the outside with a wrench.
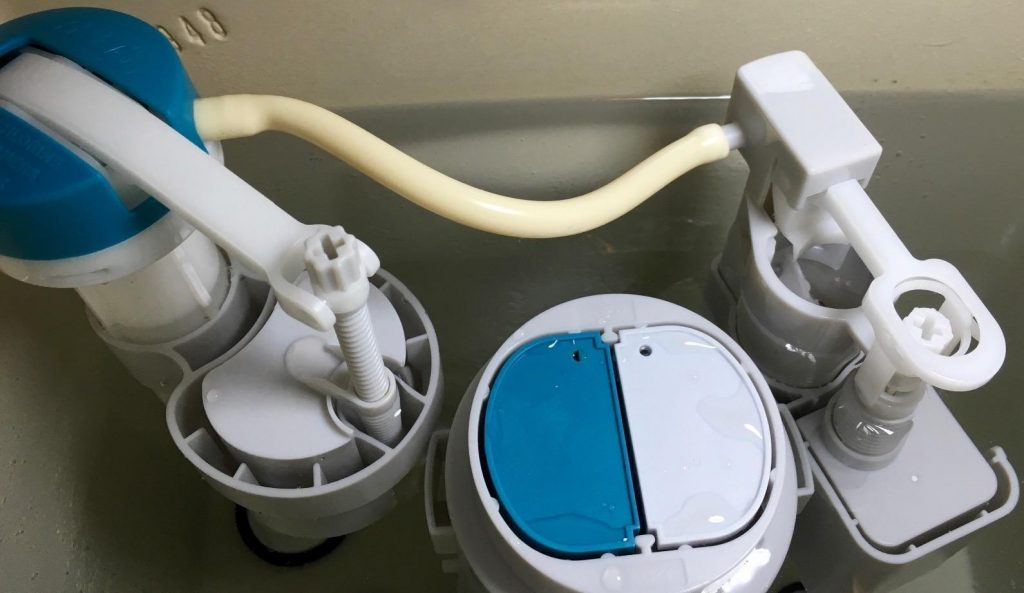
- Your new toilet tank will come with the valves preinstalled. Just make sure the fill valve lock nut at the bottom of the toilet is tight.
- Slide in the toilet tank to the bowl gasket until it covers the entire lock nut.
- Lift off the toilet tank and mount it on top of the toilet bowl by directing the protruding bolts through the 2 holes in the toilet bowl.
- Once the tank is sitting pretty on top of the tank, insert a rubber washer, then a steel washer, and a nut on each bolt from underneath the toilet bowl. Tighten both bolts alternatingly using a wrench.
- The main reason you should tighten the bolts alternatingly is to ensure that the tank stays level. If you tighten one side first, it will lean to one side. Do not, however, tighten too much to avoid cracking the bowl.
Step 6: Reconnect the Toilet Water Supply
- Connect the water supply line back to the toilet tank. The coupling connecting to the tank should only be hand-tight. Using a wrench on it might deform it.
- Turn on the water shut-off valve and let the water fill the tank.
- Flush the toilet several times to check for leaks between the toilet tank and the bowl.
- If you are satisfied with everything, cover the tank with the lid.
How to Install a Kohler Toilet Tank
New models of Kohler toilet tanks look different from other toilet tanks. If, for instance, you need to install a Kohler Cimarron toilet tank, you will notice that the toilet tank has no bolt holes.
Kohler toilet tanks use a technique called the DryLock method to install their toilet tanks. Instead of drilling holes at the bottom of the toilet tanks, Kohler installs a bracket underneath the toilet tank where bolts are hooked.
This method uses three bolts. You straighten the bolts from the bracket and install the tank on the bowl. After this, you tighten the bolts with nuts from underneath the bowl. This method is much faster and prevents the toilet from leaking, and then the toilet bolts become loose.
FAQs
1. Can you replace just the toilet tank?
Yes. If the toilet tank is cracked, but the toilet bowl is in good working condition, then you can for sure replace the toilet tank only. Just note its model number while ordering a new one. To know your toilet’s model number, check inside the toilet tank on the side that goes against the wall.
2. How tight should a toilet tank be?
While tightening a toilet tank, you need to ensure that it is tight enough to prevent it from wobbling but not too tight that you end up cracking it. Ensure you use rubber washers in combination with steel washers. The rubber washers should be in contact with the toilet tank body to prevent cracking.
3. Are toilet tanks universal?
No. Toilet tanks are not universal, even when the same manufacturer makes them. Always note your toilet tank model before buying a replacement. This number is found inside the toilet tank walls or on the manufacturer’s website.
For instance, some Kohler toilet tanks are installed using 3 bolts and have no bolt holes in the tank. You cannot, therefore, use these toilet tanks if you have a toilet bowl with 2 mounting holes.
4. Can you mix and match toilet bowl and tank
Some toilet bowls and tanks can be mix-matched, but this is not advised. A toilet bowl performs optimally if matched with the correct toilet tank. Toilet bowls have different sizes of trapways which must be properly matched with the correct toilet tank flush valve size, among other parts.