How to Replace a Toilet Handle in 10 Minutes
Last Updated on August 1, 2023 by toilethaven
How do You Replace a Toilet Handle?
A broken toilet handle must be replaced, but a loose/wiggly one can be replaced. You can also decide to replace a flimsy/old toilet handle with decent solid metal levers like these ones.
Replacing a toilet handle is pretty easy. You need a wrench and a new handle. However, it is very important to remember that a toilet handle’s connection is reverse-threaded, so instead of the usual “righty-tighty” lefty-loosey,” you will need to do the opposite.
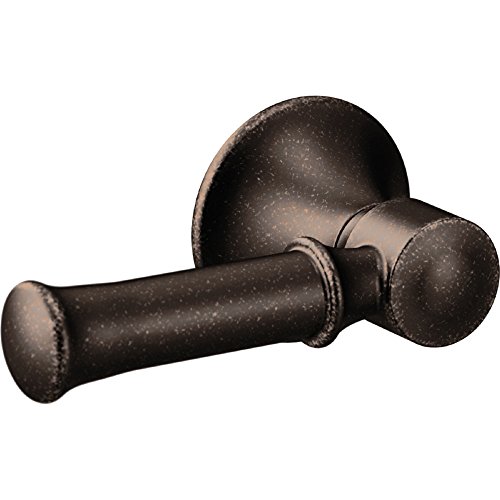
- UNIQUE FINISH: Oil-Rubbed Bronze finish delivers a rich, dark brown, Old World finish with striking light and dark accents
- COORDINATING COLLECTION: Coordinates with other accessories in the Dartmoor Collection
- FLEXIBLE PLACEMENT: Installs easily on most front, side and angle style toilets
For the most part, toilet flush handles are universal and interchangeable. However, you will first need to know if your toilet handle is front-mounted or side-mounted; apart from that, you will also need to see if it is mounted on the left or right side of the toilet.
Remove the tank lid and disconnect the flapper chain from the handle arm to replace the toilet handle. Remove the handle locking nut by turning it clockwise. Slide out the old handle and slide in the new one, and secure it with the nut. Connect the flapper chain to the arm and check if the toilet flushes properly.
How Does a Toilet Handle Work?
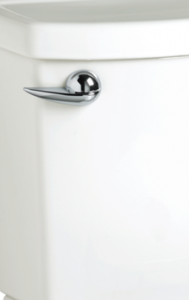
Before replacing a toilet handle, it is important to understand how it works. A toilet handle is either made of plastic or metal. It is mostly placed on the left-hand side of the toilet tank, although right-hand toilet handle toilets are available. The handle in your toilet will either be installed on the side of the toilet tank or at the front.
Toilet handles have a long arm that goes inside the toilet tank, about half the length of the toilet tank. A lift chain connects the toilet handle arm to the toilet flapper.
The toilet flapper is a rubber seal at the bottom of the tank, on top of the flush valve opening. The flush valve is the hole through which water leaves the tank and enters the bowl.
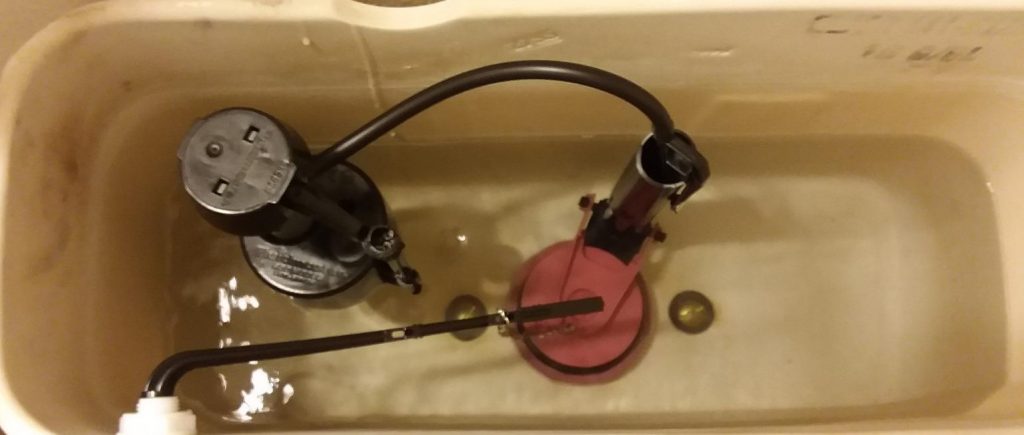
When you push the toilet handle down, the lift chain, which was, until that moment, slack, gets some tension and lifts off the flapper from the flush valve. Water flows out to the bowl for flushing to occur.
After you have released the flushing handle, the lift chain slacks off, and the flapper falls back into position, allowing the tank to refill.
A toilet handle is usually tightened to the toilet from inside the tank using a reverse-threaded lock nut. Loosen this nut with a wrench and pull out the toilet handle and its arm. Replace it with the new toilet handle and tighten it in place.
Prior to replacing the toilet handle, you may need t turn off the water supply to the toilet and drain the tank.
Are Toilet Handles Universal?
This is one of the biggest dilemmas that most people have while buying replacement toilet handles. You wouldn’t want to buy a handle that you cannot use.
Most toilet flush handles are universal and can be interchangeably used. What you must consider most is if your toilet handle is side-mounted or front-mounted. Although some toilet handles can be installed on the front and the side, most will not.
If you are not sure what to do, you may decide to purchase a toilet handle manufactured by your toilet manufacturer. Your toilet manufacturer will have the correct size handle for your toilet. Some third-party toilet handles do not tighten all the way, and you are left with a wiggling handle which can be quite annoying.
How to Replace a Toilet Handle in 10 Minutes
When you have bought the proper toilet handle, how to install it. For this repair, you will only need an adjustable wrench.
1. Turn off the Toilet water
Although this is not overly important, it makes more sense to work with an empty tank than a tank full of water. The toilet shut-off valve is usually located on the toilet’s rear wall, mostly on the left-hand side.
Turn the valve knob clockwise. If you have a push/pull valve, hold the knob of the valve and pull it gently outwards.
2. Drain the Toilet Tank
Remove the toilet tank lid and place it in a safe place. Toilet tank lids are made of porcelain and could easily crack.
You will see the lift chain connected to the toilet handle arm. Pull the lift chain up to flush the toilet. Do not be afraid to touch the water in the toilet tank. Unlike the one in the bowl, this water is clean and safe to touch.
3. Remove the Old Toilet Handle
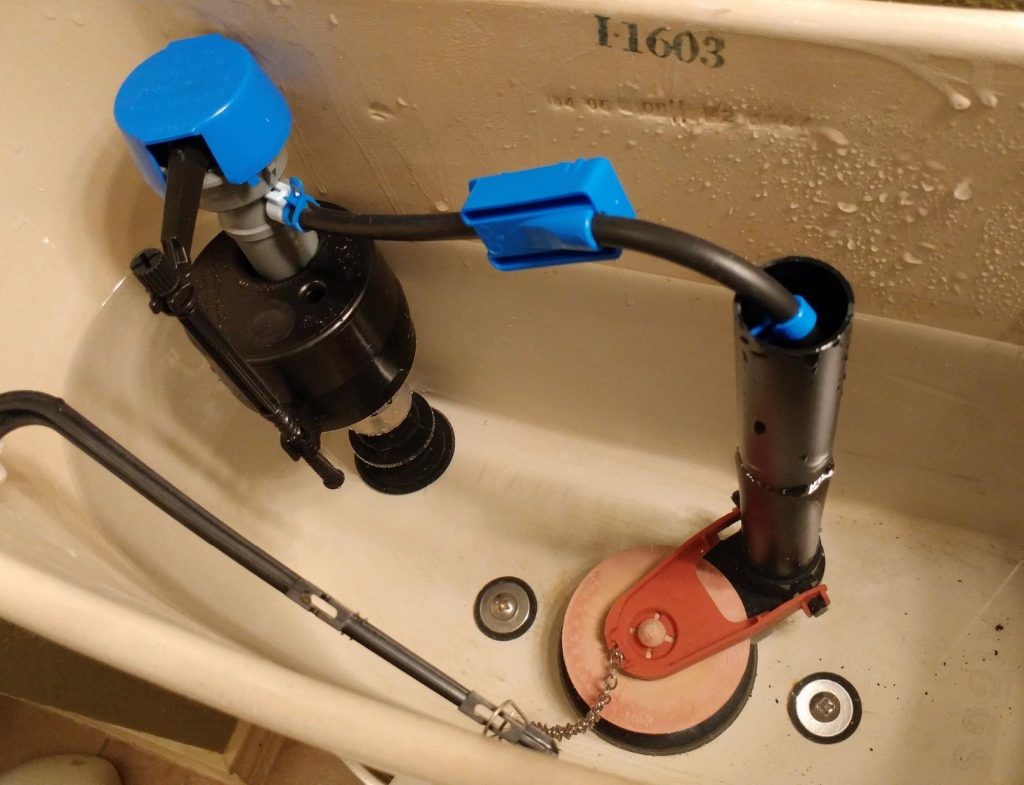
Unhook the lift chain from the toilet handle arm. You can do this with your bare hands or use needle-nose pliers. Drop the lift chain in the tank or hook it on the overflow tube.
The toilet handle is attached to the toilet tank using a lock nut on the inside of the tank. It is important to note that the toilet handle lock nut is reverse-threaded. Instead of the “tighty-righty loosey-lefty” rule, you should do the opposite and loosen it.
Why is the toilet handle nut reverse-threaded, you may ask? This is to prevent it from loosening as you flush the toilet. When you push the toilet handle down during flushing, it moves counterclockwise. This motion would, after some time, loosen the lock nut.
Use an adjustable wrench to loosen the lock nut, and remove it through the toilet handle arm when it’s out. If your toilet handle arm is plastic, the nut will also be plastic, and you wouldn’t need to use a wrench.
Wiggle the toilet handle and arm and push it out through the handle hole on the tank. Trash the handle and the nut.
4. Install the New Toilet Handle
Push the toilet handle arm through the hole, wiggling it gently until it is all in and the toilet handle is aligned correctly. Slide the lock nut through the handle arm and tighten it in place. Again, remember the lock nut is reverse threaded.
Care must be taken while tightening the lock nut. You don’t want to go wild on the nut, which might crack the toilet tank. Always hand-tighten the nut; once it’s snug, give it a ¼ turn with the wrench. Plastic nuts should only be hand-tight.
Attach the lift chain to the new toilet handle arm. Check that the lift chain is not too tight or too loose. The lift chain should ideally have a ½ inch slack when the toilet is not in use.
Push the new toilet handle down and check if it comes back up. Check also the movement of the handle arm inside the toilet tank. Ensure it is free and not touching any other toilet part or the tank’s walls.
5. Turn On the Water Supply
Turn on the water supply to the toilet by turning the shut-off valve counterclockwise. Once the tank is full, flush the toilet and check if everything works well. If you are happy with everything, put the toilet tank lid back on and continue using your toilet.
And that is how to replace a toilet handle on your own. It is one of the easiest home repairs, and you should not have to pay a plumber to do it.
FAQs
1. How much is the toilet handle?
Most toilet handle cost between 5 to 20 dollars. High-end toilet handles will cost more than that. A plumber will take at least 50 dollars to replace a toilet handle.
2. Why do I have to hold down my toilet handle?
If you must hold down your toilet handle for your toilet to flush, most likely, the lift chain is too loose and is not lifting the flapper high enough. This can also result in a weak flush. Remove the tank lid and check the condition of the chain. It should have a ½ inch of slack.
3. Why is my toilet handle so hard to push down?
If the lift chain is hooking onto something inside the toilet tank, you will find pushing the toilet handle down very hard. An old and worn toilet flapper could also be the culprit.