Toilet Leaking From Tank to Bowl? Do This!
Last Updated on October 4, 2023 by toilethaven
Why is there Water Trickling into my Toilet Bowl?
Whenever your toilet tank leaks, it will either leak from the tank to the bowl or between the tank and the bowl. It would be best to fix a leaking toilet as a matter of urgency as it wastes a lot of water and can cause water damage to your home.
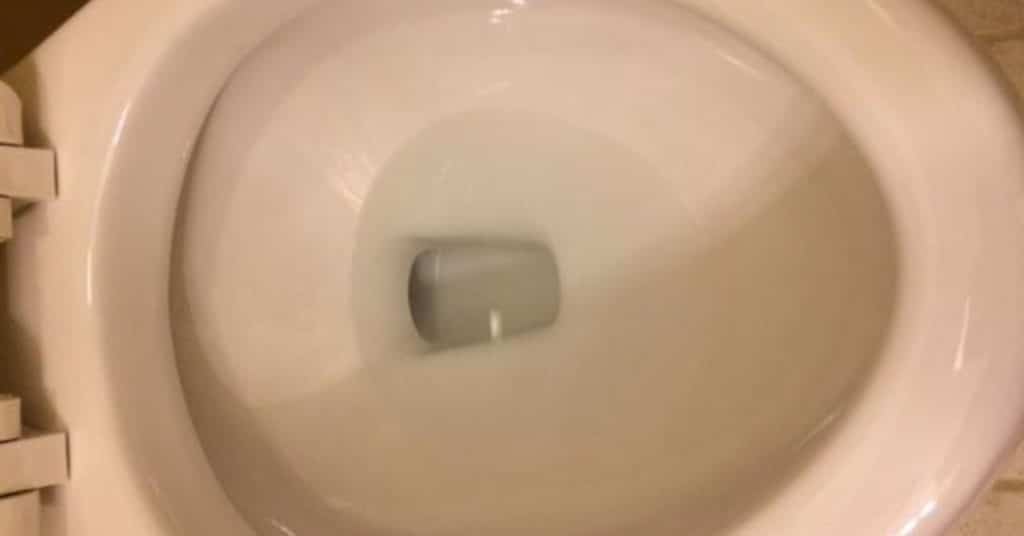
You can use a simple test to check if your toilet is leaking from the tank to the bowl: drop some food color or dye inside the tank and wait 30 minutes without flushing the toilet.
If the color/dye appears inside the toilet bowl, you indeed have a toilet leaking from the tank to the bowl.
A toilet leaking from the tank to the bowl is usually caused by a worn-out, warped, or dirty toilet flapper. A misaligned or worn-out flush valve seal is typically the culprit in dual flush toilets. Clean or replace the toilet flapper/flush valve seal to stop the leak.
Sometimes, the lift chain can hook against another toilet tank part and, in the process, lift the toilet flapper off the flush valve opening. If that happens, water will continuously trickle from the tank to the bowl.
Water constantly leaking from the tank to the bowl is also a running toilet. Sometimes, you can see the water, but it trickles in so slowly that you will barely notice it.
If your toilet leaks between the tank and the bowl, the toilet tank bolts or tank-to-bowl gasket are usually the problem. Replacing one of them or even both is enough to fix the problem.
Why and How a Toilet Flapper Causes Leaks
When you pull down the flush lever to flush a toilet, water leaves the tank and enters the bowl via the flush valve. A toilet flapper is used to seal around the flush valve opening when the toilet is not flushed.
The flapper is connected to the flush lever using a lift chain. Pulling the flush lever down, the lift chain lifts the flapper of the flush valve opening, allowing water to flow to the bowl via the flush valve.
Four things can happen to a toilet flapper that can cause it to allow water to leak through it:
- It can harden, causing it to bend/warp. A warped toilet flapper will no longer make a watertight seal on the flush valve and, hence, a leaking/running toilet.
- Mineral deposits (especially calcium) and other debris can accumulate underneath the flapper, preventing it from sealing.
- Being made of rubber, the toilet flapper will wear out after continued usage, which is what causes leaks most of the time.
- The lift chain can get entangled or hooked against something inside the tank, lifting the flapper off the flush valve and, therefore, a continuously running toilet.
How to Fix a Toilet Leaking from the Tank to the Bowl
As I had mentioned earlier, the solution to a toilet leaking from the tank to the bowl is a replacement of the flapper, but cleaning it will also fix it if mineral deposits and/or debris cause the leak.
If you have a dual flush toilet (flushed using buttons at the top of the lid), you may need to replace the flush valve seal or just remove it and put it the other way.
We will look at how to fix a leaking dual-flush toilet later in this post. Let us start with a single flush toilet leaking from the tank to the bowl.
These are the steps to follow:
1. Turn off the Water to the Toilet
- Look for an oval-shaped knob on the wall behind the toilet. That is the toilet’s shut-off valve. To shut off the water to the toilet, turn this valve all the way clockwise. If you have a push/pull valve, pull the handle out.
- Flush the toilet and hold the flushing lever down to remove as much water as possible from the tank.
2. Inspect the Toilet Tank
- Lift off the toilet tank lid and place it away safely so it cannot fall off and break.
- Check the condition of all the tank parts. Is the flapper sitting perfectly on the flush valve? Is the lift chain hooking on anything?
If indeed the lift chain is hooking on another toilet tank part or the flush valve is off the flush valve, fix it and turn on the water.
Let the tank fill with water and repeat the dye/food color test. Check if the leaking has stopped after 30 minutes.
3. Remove and Inspect the Toilet Flapper
If the toilet flapper is sitting pretty on the flush valve opening and the lift chain is free and not too tight, you will need to remove and inspect it physically.
- Disconnect the lift chain from the flush lever arm and drop it inside the toilet tank.
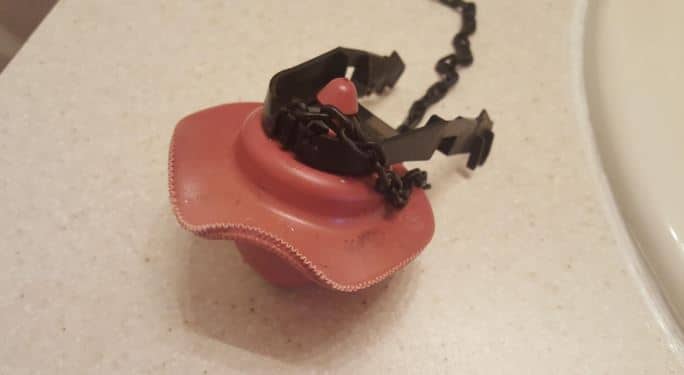
- A toilet flapper has two ears hooked on two pegs on the flush valve. Disconnect the flapper from the flush valve and lift it off.
- Check if the flush valve is bent/warped worn out, or if minerals underneath it prevent it from sealing.
4. Clean/Replace the Toilet Flapper
- If debris and mineral deposits are underneath the flapper, thoroughly clean it with running water in the bathroom sink until it is spotlessly clean.
- Do not forget to clean the top of the flush valve where the toilet flapper sits. Clean the entire toilet tank if it has a layer of sediment at the bottom.
A warped or worn-out toilet flapper will need to be replaced. Toilet flappers are not the same size. They vary in size from 2 to 4 inches. Check the size of your old flapper before buying a new one.
If you are unsure how to do it, take it to the nearest home improvement store and ask for an exact replacement. Most toilet flappers are universal.
When you have bought the correct toilet flapper, this is how to replace it:
- Clean the top of the flush valve or the entire toilet tank.
- Place the flapper at the top of the flush valve and connect the two ears to the two pegs on the flush valve.
- Connect the lift chain to the flush lever arm and adjust the slack. A flapper lift chain should ideally have a ½-inch slack.
- Turn on the water to the toilet at the shut-off valve and leave the tank filled with water.
- Drop some food color inside the toilet tank and wait 30 minutes without flushing the toilet.
- If the food color does not appear inside the bowl after 30 minutes, the leak has stopped.
- Put back the tank lid.
And that is how to fix a single flush toilet leaking from the tank to the bowl.
How to fix a Dual Flush Toilet Leaking from the Tank to the Bowl
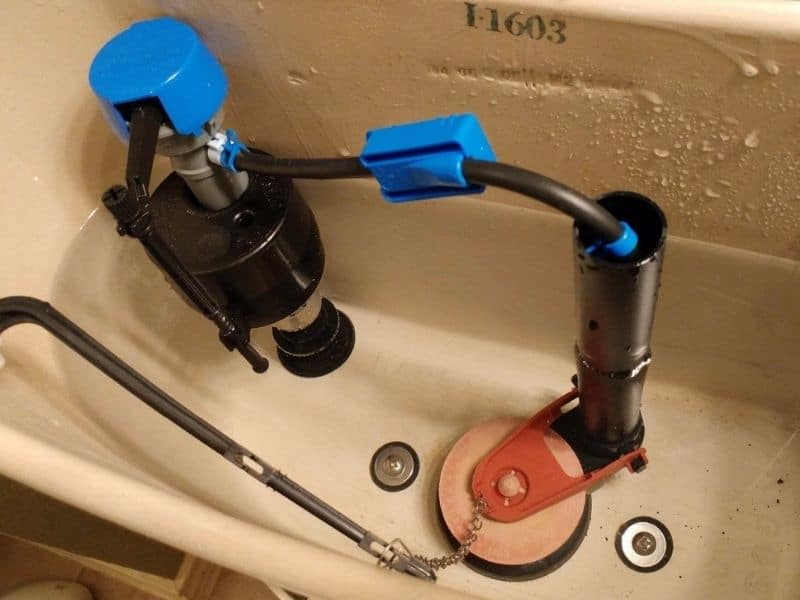
A dual flush toilet does not have a flush lever with a lift chain and flapper connected to it. It uses flush buttons at the top of the tank lid, which releases less or more water into the bowl, depending on which button you press.
Pressing any of the two buttons triggers a mechanism that lifts off the flush valve and seals off the flush valve opening, allowing water to enter the bowl.
The flush valve seal is usually installed at the bottom of the flush valve assembly, which is the big assembly in the middle of the tank. Like the flapper, the flush valve seal/washer can get dirty or even warp, causing leaks.
This is how to fix a dual flush toilet leaking from the tank to the bowl:
- Turn off the water to the toilet.
- Flush the toilet and press the button to remove as much water as possible.
- Remove the toilet tank lid.
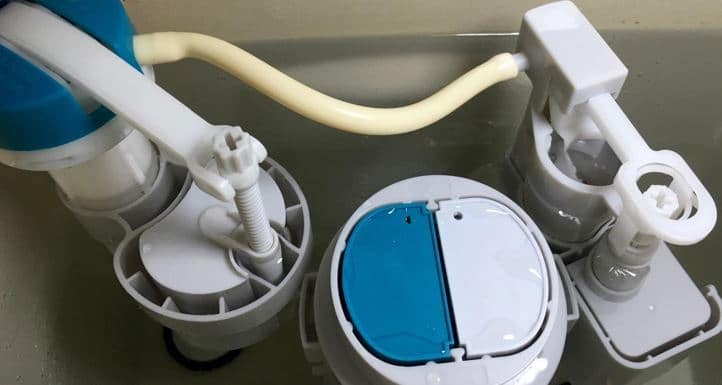
- Grab the flush valve assembly, give it a 1/8 turn counterclockwise, and lift it off.
- Inspect the condition of the flush valve at the bottom of the assembly.
- If it looks dirty, clean it using a soft cloth.
- Do not forget to clean the top of the flush valve where the seal sits.
- Before you decide to replace the flush valve seal if it looks warped, I use one trick, and it works almost all the time: Remove the seal and put it back the other way around.
- Install the flush valve assembly by pushing it down and turning it 1/8 turn clockwise.
- Turn on the way to the tank.
- Add some food color and wait for 30 minutes without flushing the toilet.
- Replace the flush valve seal if the food color appears in the bowl. No food color in the bowl means the leak has stopped.
- Place the tank lid back in place.
And basically, that is how to fix a toilet leaking from the tank to the bowl.