Toilet Not Clogged But Not Flushing Properly Fixed!
Last Updated on October 4, 2023 by toilethaven
Why Won’t My Toilet Flush but Isn’t Clogged?
Gravity flush toilets depend on gravity to dump a large volume of water in the bowl quickly to create a strong flush. It is the action of dumping a large volume of water in the bowl that creates the siphoning effect, which evacuates waste from the bowl.
The flush valve, rim holes, and siphon jets need to be fully open for water to flow from the tank to the bowl within the shortest time possible. You also need to have the correct level of water inside the tank.
If your toilet is not clogged but won’t flush all the way, it is a sign that the siphon jet and rim holes are clogged or the water level inside the tank is too low. The problem could also be caused by a bent/warped flush valve, slack lift chain, or a poorly designed drain pipe.
A clogged siphon jet and rim holes are usually the culprit if you live in an area with hard water. This is mainly caused by calcium deposits, commonly known as limescale.
If you are dealing with a new toilet that is not flushing all the way, you most likely have a poorly designed drainpipe. A toilet drainpipe needs to be sloped downwards to allow the waste to easily be evacuated from the bowl via gravity.
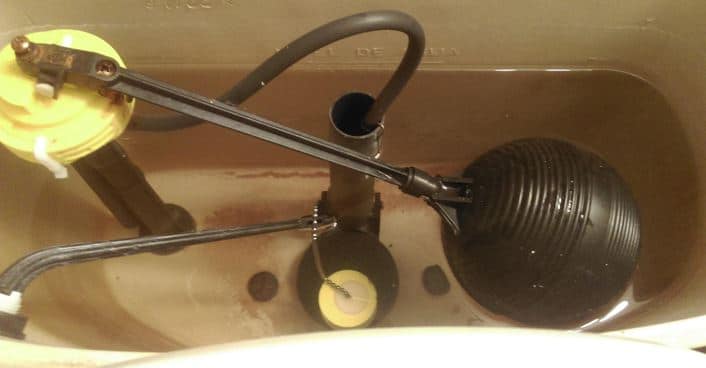
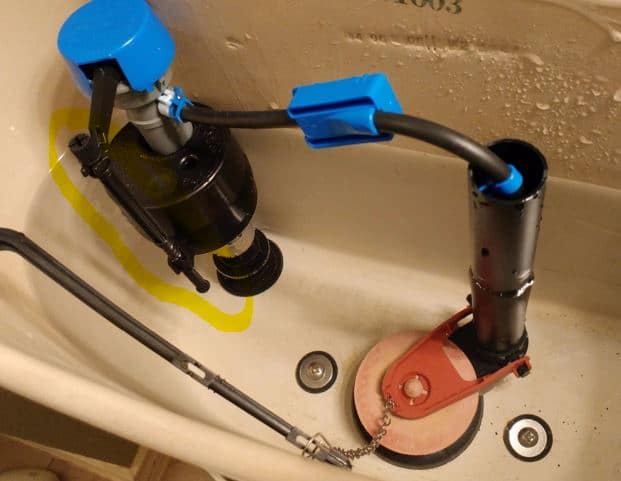
A toilet flapper is the rubber piece at the bottom of the tank that seals over the flush valve. It is connected to the lift chain, which is, in turn, connected to the flush handle via the handle arm.
The lift chain should not be too slack. Otherwise, it will not lift the toilet flapper all the way, meaning less water than intended will enter the tank. This will, in turn, result in a weak flushing toilet.
A warped or bent toilet flapper means water will slowly seep underneath it and enter the bowl, reducing the water available for flushing. Again, this will result in a toilet that won’t flush.
Now let us look at why your toilet won’t flush all the way and is not clogged in more detail.
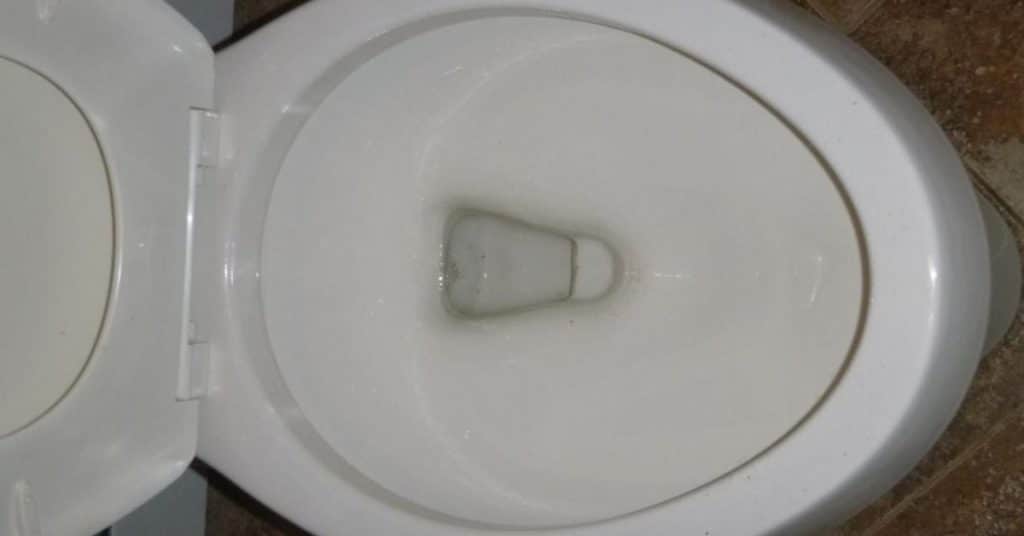
1. Clogged Siphon Jet and Rim Holes
When you pull the toilet flush handle down, the lift chain lifts the flapper out of the flush valve opening, allowing water to flow down to the bowl. Water enters the bowl through the siphon jet and rim holes.
A siphon jet is a hole at the bottom of the toilet bowl straight opposite the drain opening. It pushes a large amount of water down the toilet’s P-trap to help create a stronger siphon, which helps flushing.
Not all toilets have a siphon jet.
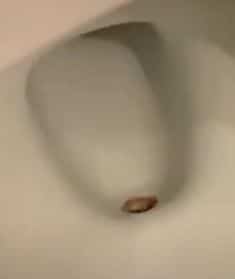
Rim holes are tiny holes located all around the rim of the bowl. In toilets with siphon jets, rim holes are used to rinse the bowl, but those without siphon jets also use water from these holes for flushing.
You can easily see these rim jets if you hold a small mirror just underneath the rim of the toilet bowl, as shown in the image below.
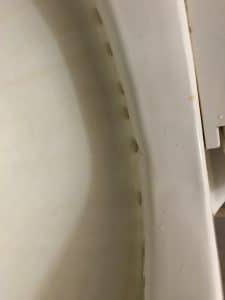
Modern toilets like Toto toilets, which use the Tornado/double-cyclone flushing systems, only have two holes/jets on the bowl’s rim, but they, too, could get clogged.
Most of the time, when your toilet drain is clogged but won’t flush all the way, mineral deposits clog the siphon jet, rim holes, or both. They could either be partially or fully clogged.
Clogged rim holes and siphon jet means that no water or very little of it enters the bowl from the tank during the flushing cycle. As I mentioned, you need a large volume of water to be dumped inside the bowl quickly to generate a decent flush.
To fix this problem, you will only need to unclog the siphon jets and holes. This is easier than unclogging a toilet drain.
How to Unclog Toilet Siphon Jet and Rim Holes
For this task, you will need the following:
- White vinegar
- A small L-shaped wrench
- Nylon gloves
- A thin hose (optional)
- Baking soda (optional)
After gathering all the necessary items, it is time to get down to business.
- Start by locating the siphon at the bottom of the bowl.
- Wear the gloves and try to feed the thin hose through it in an attempt to unclog it. If you do not have the hose, push your finger inside it and try to remove as much calcium as possible.
- Flush the toilet and check if the flushing power has increased. If it has, you have found the source of your problem. What you need to do next is to remove all the calcium deposits.
- Use a plunger to force as much water as possible from the bowl. Alternatively, soak it with a cloth until the bowl is empty.
- Remove the toilet tank lid and place it away. Make sure you put it in a safe place where it can’t fall and break.
- Carefully pour the vinegar down the overflow tube (about 2 cups). The overflow tube is the large tube inside the toilet tank.
- Since the vinegar will find its way to the bottom of the bowl, you can also pour a cup of baking soda to quicken the breaking down of the limescale.
The vinegar will soak up the calcium in the siphon jet and rim holes, thereby fully opening them. Some people use muriatic acid, but it is not good for the toilet finish, the environment, and people on septic systems.
- Wait for about 3 hours or overnight if you have the time.
- Use an Allen wrench to poke through each rim hole to ensure they are all open.
- Flush the toilet and check if it flushes as powerfully as it should.
And basically, that is how to unclog a toilet’s siphon jet and rim holes. To avoid this problem in the future, it is always a good idea to occasionally pour some vinegar or dish soap down the overflow tube.
2. Low Water Level in the Toilet Tank
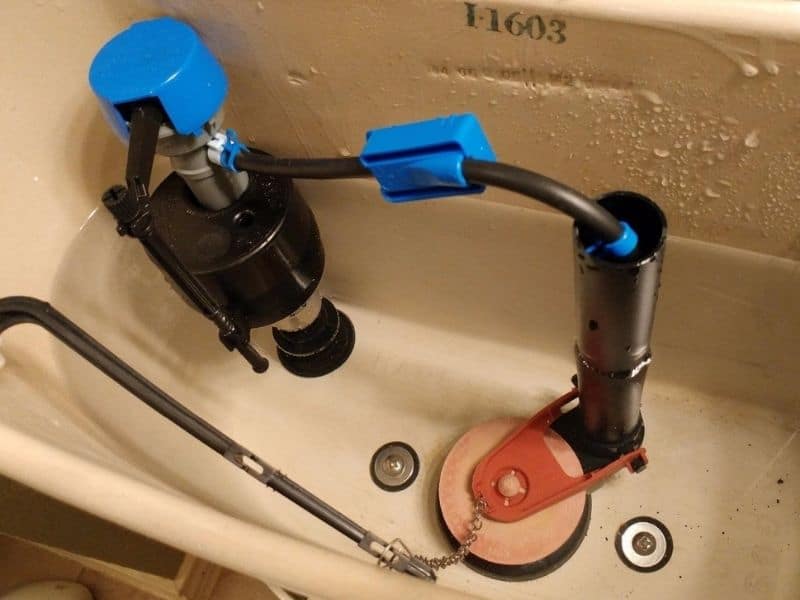
The water level in your toilet tank should be about ½-inch below the overflow tube. If it is more than that, the extra water will flow down to the bowl via the overflow tube, hence a leaking toilet.
When the water level in a toilet tank is too low, the toilet will not generate the required siphon during the flushing cycle, meaning that it will not flush all the way despite it not being clogged.
A low water level inside a toilet tank also means a low water level at the bottom of the toilet bowl. This is because there is a small tube (refill tube) connecting the fill valve to the overflow tube.
As the fill valve fills the tank with water, the refill tube sends a small amount of water down to the bowl via the overflow tube.
You will need to adjust the toilet float to adjust the water level inside the toilet tank. Toilet floats regulate the opening and closing of the fill valve by moving up and down the tank relative to the water level.
This is how to adjust the water level in a toilet tank:
- Check if you have a float ball (ballcock) or a float cup. Ballcocks are found in old toilets, and as their name implies, they have a balloon-like ball connected to the fill valve using an arm. Float cups are small in size and are connected alongside the vertical body of the fill valve.
- If you have a float ball, check where the float arm/lever connects to the fill valve. You will see a small screw. Use a screwdriver to slowly turn the screw clockwise until the water level is just about ½-inch below the top of the overflow tube.
- If you have a float cup, look for a long plastic screw alongside the fill valve. You can use your bare hand or screwdriver to turn the screwdriver clockwise to increase the water level inside the toilet tank.
With the new water level in the tank, flush the toilet and check if it is flushing strongly again.
3. Warped or Bent Toilet Flapper
Although toilet flappers can last for a long time, they can warp or bend, which means they will cease creating the tight seal they are designed to do on top of the flush valve. When that happens, water will slowly leak from the tank to the bowl.
Mineral deposits underneath the flapper can also cause this problem. As we have seen, insufficient water in the tank results in a weak flushing toilet.
At times, when the water level in the tank drops below the fill valve kick-in level, the toilet tank will start to refill on its own. This is the phenomenon mostly referred to as ghost flushing.
Unless you have mineral deposits under your flapper, which you can easily clean, a warped or bent toilet flapper will need a replacement.
Replacing a toilet flapper is easy and cheap if you do it yourself. I have written a detailed guide on the same. Read it here.
4. Slack Lift Chain
Your toilet’s lift chain must have ½-inch slack for a decent flush. If it is too slack, it will not lift the flapper all the way up during flushing, meaning less water will flow into the bowl.
Another problem with a lift chain is that it could disconnect from the lever or flapper. It can sometimes get hooked to another toilet tank part, limiting its movement.
Toilet lift chains rarely have problems, but when they do, they are not easy to find since you don’t even think about them. Fix the lift chain if it is the culprit.
5. Poorly Designed Drainpipe
This problem only affects new toilets. If your toilet had decent flush power in the past and only deteriorated recently, then this will not apply to you.
A toilet’s P-trap helps in creating a siphon. After the P-trap, the drainpipe needs to be installed on a downward slope to help the waste quickly move out of the bowl.
Unfortunately, this is not a problem you can find out or fix alone. You will need to hire a professional plumber to troubleshoot and fix it, which is expensive.
And basically, that is how to fix a toilet that is not clogged but won’t flush all the way.